本篇用Github Copilot重写上篇 集成GPT-4的Cursor 的文章里的代码。
在写代码之前,先说下Github Copilot在写文档写文章上的使用体验。
Github Copilot不仅可以用来写代码,也可以用于写文档。实际上篇公众号关于 集成GPT-4的Cursor 的文章里的内容,我就是用Github Copilot辅助完成的。Github Copilot的使用体验非常好,我只需要输入一些关键词,比如“集成GPT-4的Cursor”,然后就会自动给我补全接下来的内容,很多时候正是我需要的内容,只要按下tab键就会自动补全到文章里,这个过程非常快,非常方便。不像ChatGPT,bing AI需要在另外的聊天窗口执行后复制到文章里,这个过程又慢又繁琐,Github Copilot可以将AI无缝接入到编辑的光标下,适合人和AI的无缝融合。
更神奇的是,我文章里用到了大量的图片,Github Copilot也能自动识别图片的信息和图片里的文字,因为在补全相关文字的时候,应该是扫描过插入的图片后,综合图片的信息后给出的文字。
下面开始用Github Copilot写代码:
Github Copilot的代码补全功能和Cursor不太一样的地方是,Cursor会给出完整的代码,而Github Copilot往往只给出一部分代码,或者一个完整的函数,且需要通过tab键决定是否采用Github Copilot的建议,整个过程往往还需要自己去写点代码。但这个过程也非常流畅,非常方便。Github Copilot更体现了Copilot,飞行副驾驶,重在辅助。
和Github Copilot一起完成的代码如下:
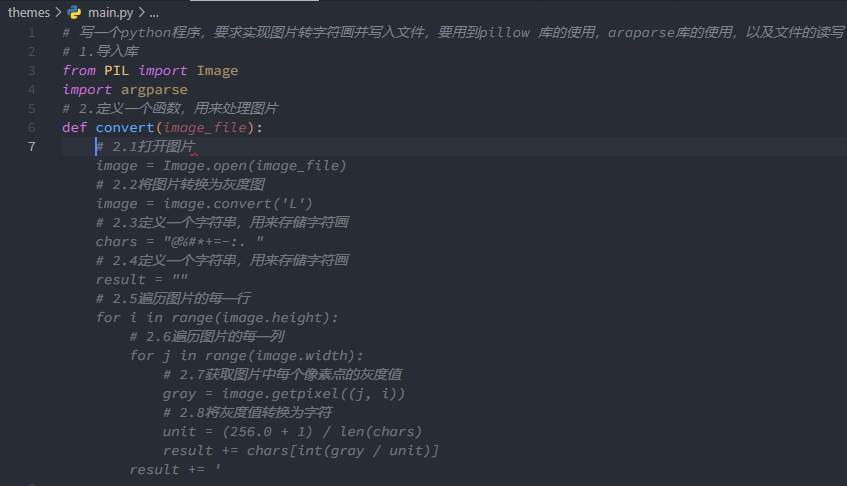
# 写一个python程序,要求实现图片转字符画并写入文件,要用到pillow 库的使用,araparse库的使用,以及文件的读写
# 1.导入库
from PIL import Image
import argparse
# 2.定义一个函数,用来处理图片
def convert(image_file):
    # 2.1打开图片
    image = Image.open(image_file)
    # 2.2将图片转换为灰度图
    image = image.convert('L')
    # 2.3定义一个字符串,用来存储字符画
    chars = "@%#*+=-:. "
    # 2.4定义一个字符串,用来存储字符画
    result = ""
    # 2.5遍历图片的每一行
    for i in range(image.height):
        # 2.6遍历图片的每一列
        for j in range(image.width):
            # 2.7获取图片中每个像素点的灰度值
            gray = image.getpixel((j, i))
            # 2.8将灰度值转换为字符
            unit = (256.0 + 1) / len(chars)
            result += chars[int(gray / unit)]
        result += '\n'
    return result
# 3.定义一个主函数,用来处理命令行参数
def main():
    # 3.1创建一个解析器
    parser = argparse.ArgumentParser()
    # 3.2添加参数
    parser.add_argument('file')
    parser.add_argument('-o', '--output')
    parser.add_argument('--width', type=int, default=80)
    parser.add_argument('--height', type=int, default=80)
    # 3.3解析参数
    args = parser.parse_args()
    # 3.4获取参数
    image_file = args.file
    width = args.width
    height = args.height
    output = args.output
    # 3.5调用convert函数,将图片转换为字符画
    result = convert(image_file)
    # 3.6判断是否需要将字符画写入文件
    if output:
        with open(output, 'w') as f:
            f.write(result)
    else:
        with open('output.txt', 'w') as f:
            f.write(result)
# 4.调用主函数
if __name__ == '__main__':
    main()
运行代码:
PS C:\Users\hanwei\Documents\GitHub\backendcloud-3-hexo\themes> python main.py .\golang.png
发现生成的图片太大了,整个屏幕只能显示一小部分,比如上面的耳朵和眼睛。
对比下Cursor生成的代码,应该先将图像的像素压缩下。
将
# 2.定义一个函数,用来处理图片
def convert(image_file):
    # 2.1打开图片
    image = Image.open(image_file)
加一行改成
# 2.定义一个函数,用来处理图片
def convert(image_file):
    # 2.1打开图片
    image = Image.open(image_file)
    image = image.resize((80, 80), Image.NEAREST)
再运行一次:
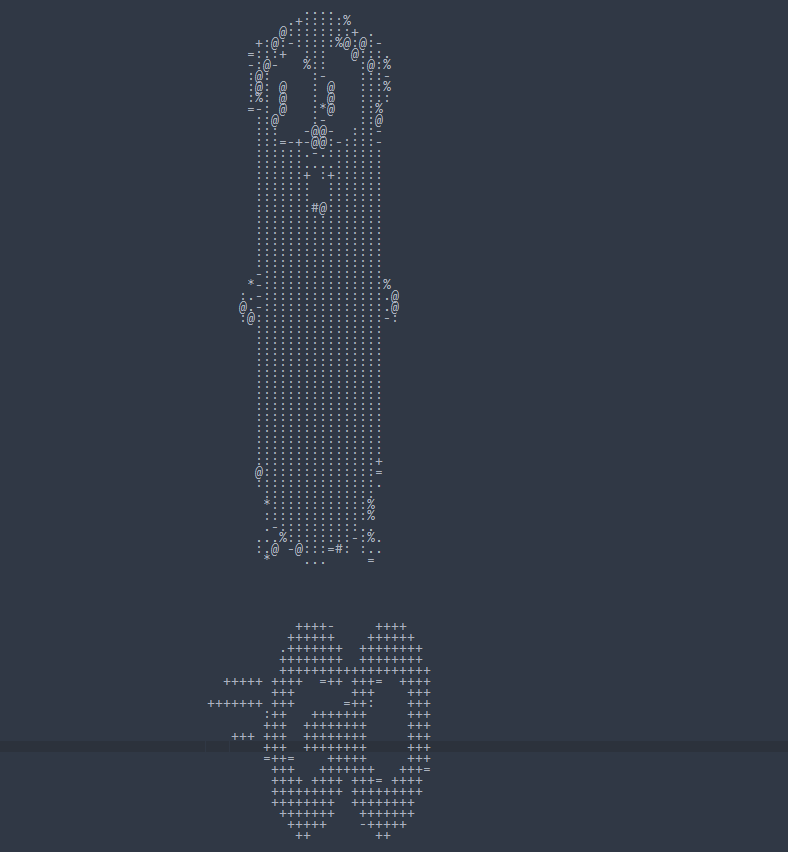
比例不对,后加的代码里的参数,用了80,80,原来的横图压缩成了正方形的图,压缩的太廋了,不调整了,意思一下就行。
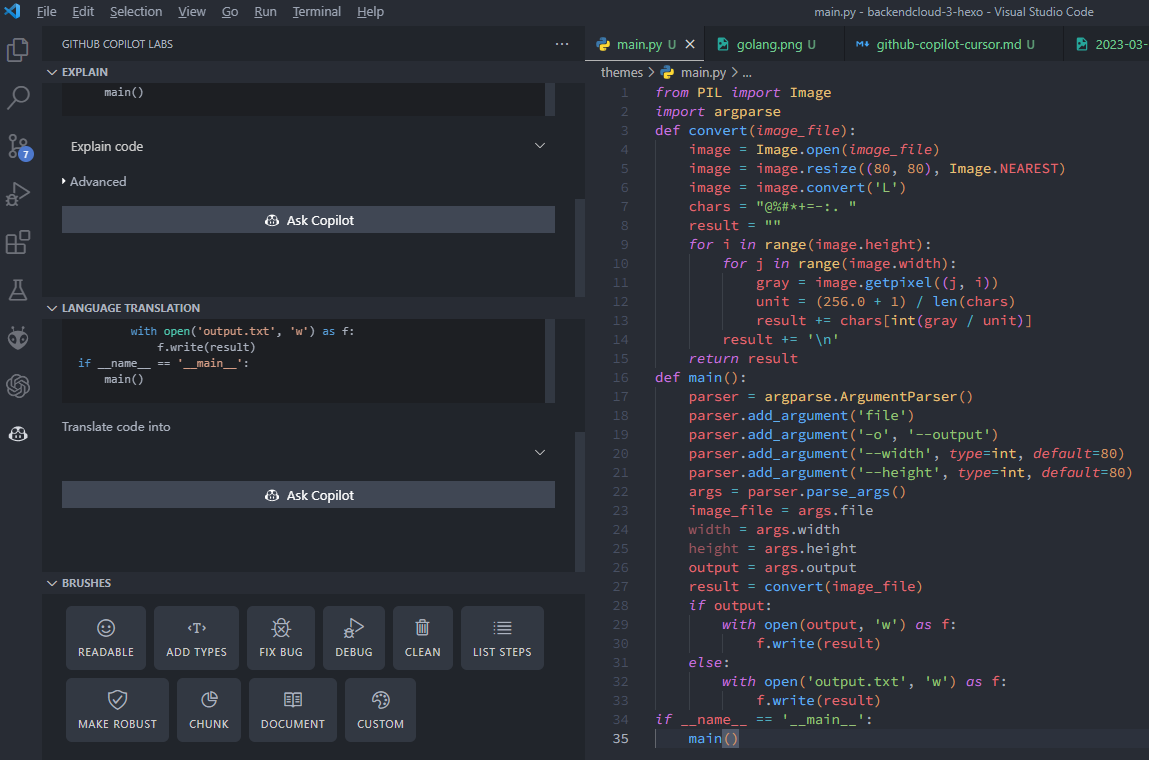
下面使用Github Copilot Lab。Github Copilot Lab可以让AI解释代码,将代码翻译成其他编程语言,让AI写注释,写文档,让AI增加debug代码,让AI写单元测试,让AI修改程序让程序更健壮。
虽然笔者第一时间加入了等待列表,现在还在github copilot X等待列表,没有体验过X,但是感觉Github Copilot和Github Copilot Lab的结合已经有了github copilot X的宣传的主要功能。
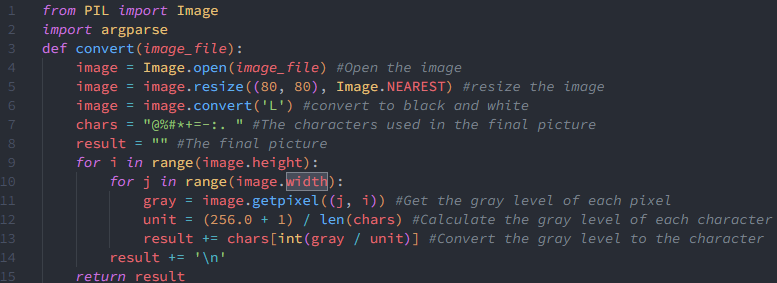
下面,先删除所有注释,让Github Copilot Lab重新写注释:
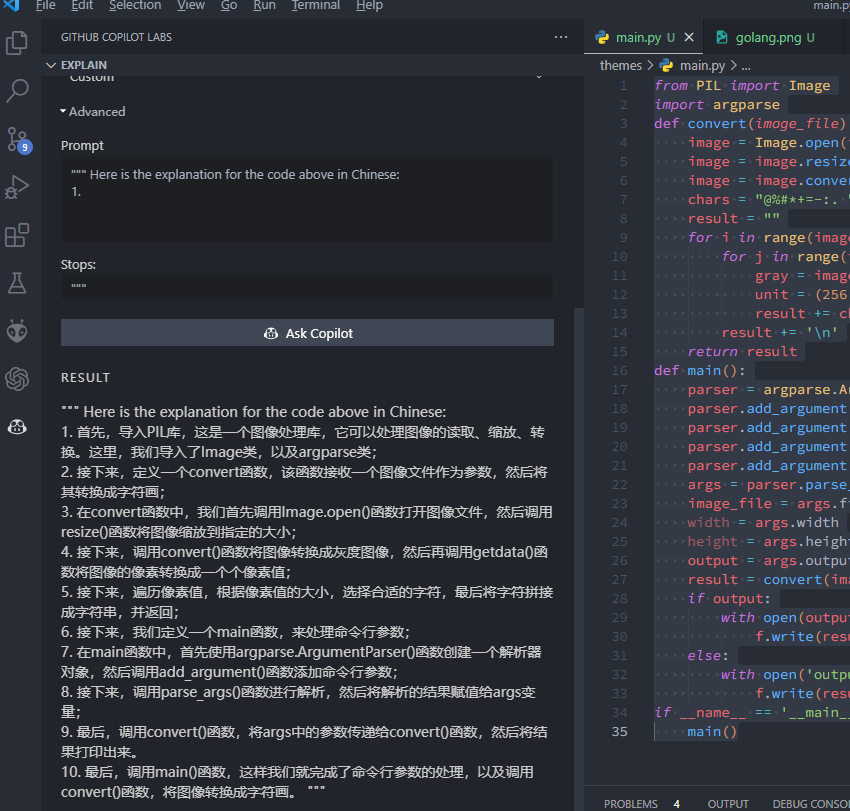
让AI解释下这段代码:
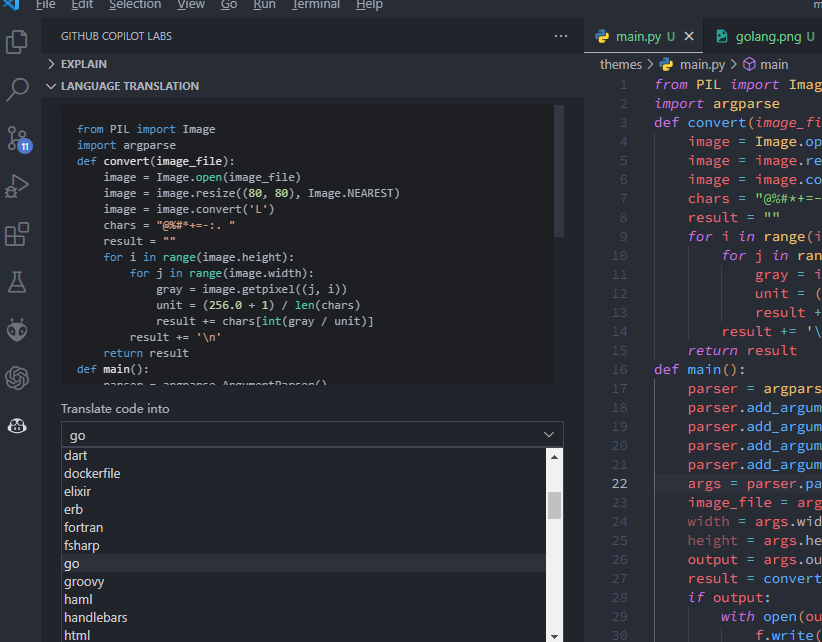
让AI将这段Python代码翻译成Golang代码:
import argparse
import image
import os
func main() {
    parser := argparse.NewParser("image", "Converts a image to ASCII art")
    parser.String("1", "file", &argparse.Options{Required: true, Help: "Image file"})
    parser.String("o", "output", &argparse.Options{Required: false, Help: "Output file", Default: ""})
    parser.Int("W", "width", &argparse.Options{Required: false, Help: "Width of the output image", Default: 80})
    parser.Int("H", "height", &argparse.Options{Required: false, Help: "Height of the output image", Default: 80})
    err := parser.Parse(os.Args)
    if err != nil {
        fmt.Println(err)
        return
    }
    imageFile := parser.String("file")
    width := parser.Int("width")
    height := parser.Int("height")
    output := parser.String("output")
    result := convert(imageFile, width, height)
    if output != "" {
        err := ioutil.WriteFile(output, []byte(result), 0644)
        if err != nil {
            fmt.Println(err)
            return
        }
    } else {
        err := ioutil.WriteFile("output.txt", []byte(result), 0644)
        if err != nil {
            fmt.Println(err)
            return
        }
    }
}
func convert(imageFile string, width int, height int) string {
    img, err := image.Open(imageFile)
    if err != nil {
        fmt.Println(err)
        return ""
    }
    img = img.Resize(width, height, image.NearestNeighbor)
    img = img.Convert(image.L)
    chars := "@%#*+=-:. "
    result := ""
    for i := 0; i < img.Height(); i++ {
        for j := 0; j < img.Width(); j++ {
            gray := img.At(j, i)
            unit := (256.0 + 1) / len(chars)
            result += string(chars[int(gray/unit)])
        }
        result += "

"
    }
    return result
}
转载请注明来源,欢迎指出任何有错误或不够清晰的表达。可以邮件至 backendcloud@gmail.com

