目录:(可以按w快捷键切换大纲视图)
VMware创建三个vm,规格2cpu 4G mem 200G disk,一个NAT网卡
环境说明:
主机名 操作系统版本 ip 备注
master Centos 7.7.1908 192.168.174.156 master主机
node01 Centos 7.7.1908 192.168.174.157 node节点
node02 Centos 7.7.1908 192.168.174.158 node节点
前期准备(所有节点)
修改主机名(若安装os的时候已经修改过,则跳过)
# hostnamectl set-hostname <hostname>
修改hosts文件
# cat << EOF >> /etc/hosts
192.168.174.156 master
192.168.174.157 node01
192.168.174.158 node02
EOF
安装常用基础包vim,wget,yum-utils,device-mapper-persistent-data,lvm2,bash-completion
# yum install -y vim wget yum-utils device-mapper-persistent-data lvm2 bash-completion
# source /etc/profile.d/bash_completion.sh
关闭防火墙,selinux,swap
# systemctl stop firewalld
# systemctl disable firewalld
# setenforce 0
SELINUX=enforcing修改成SELINUX=disabled
# sed -i 's/SELINUX=.*/SELINUX=disabled/g' /etc/selinux/config
# swapoff -a
# sed -i.bak '/swap/s/^/#/' /etc/fstab
免密登陆
第一个节点执行
# ssh-keygen -t rsa
回车回车到结束
秘钥同步至其他节点
ssh-copy-id -i /root/.ssh/id_rsa.pub root@<其他节点>
免密登陆测试
第一个节点执行
# ssh <其他节点的ip>
# ssh <其他节点的hostname>
安装docker(所有节点)
设置docker源
# yum-config-manager --add-repo https://download.docker.com/linux/centos/docker-ce.repo
安装Docker CE
# yum list docker-ce --showduplicates | sort -r
# yum install -y docker-ce-18.09.6 docker-ce-cli-18.09.6 containerd.io
启动docker
# systemctl start docker
# systemctl enable docker
配置国内镜像加速
登陆地址为:https://cr.console.aliyun.com ,未注册的可以先注册阿里云账户
点击左下角的镜像中心的镜像加速器
# mkdir -p /etc/docker
# sudo tee /etc/docker/daemon.json <<-'EOF'
{
  "registry-mirrors": ["https://w6pljua0.mirror.aliyuncs.com"]
}
EOF
# systemctl daemon-reload
# systemctl restart docker
验证docker安装
# docker --version
# docker run hello-world
k8s安装前的准备工作(所有节点)
内核参数修改
# cat <<EOF >  /etc/sysctl.d/k8s.conf
net.bridge.bridge-nf-call-ip6tables = 1
net.bridge.bridge-nf-call-iptables = 1
EOF
modprobe br_netfilter
# sysctl -p /etc/sysctl.d/k8s.conf
修改Cgroup Driver
# vim /etc/docker/daemon.json
新增‘"exec-opts": ["native.cgroupdriver=systemd"’
# cat /etc/docker/daemon.json
{
    "registry-mirrors": ["https://v16stybc.mirror.aliyuncs.com"],
    "exec-opts": ["native.cgroupdriver=systemd"]
}
重新加载docker
# systemctl daemon-reload
# systemctl restart docker
修改cgroupdriver是为了消除告警:
[WARNING IsDockerSystemdCheck]: detected "cgroupfs" as the Docker cgroup driver. The recommended driver is "systemd". Please follow the guide at https://kubernetes.io/docs/setup/cri/
设置kubernetes源
# cat <<EOF > /etc/yum.repos.d/kubernetes.repo
[kubernetes]
name=Kubernetes
baseurl=https://mirrors.aliyun.com/kubernetes/yum/repos/kubernetes-el7-x86_64/
enabled=1
gpgcheck=1
repo_gpgcheck=1
gpgkey=https://mirrors.aliyun.com/kubernetes/yum/doc/yum-key.gpg https://mirrors.aliyun.com/kubernetes/yum/doc/rpm-package-key.gpg
EOF
# yum clean all
# yum -y makecache
安装k8s(Master节点)
# yum list kubelet --showduplicates | sort -r
# yum install -y kubelet-1.14.2 kubeadm-1.14.2 kubectl-1.14.2
启动kubelet并设置开机启动
# systemctl enable kubelet && systemctl start kubelet
kubelet命令补全
# echo "source <(kubectl completion bash)" >> ~/.bash_profile
# source .bash_profile
编辑下载镜像的脚本
# cat image.sh
#!/bin/bash
url=registry.cn-hangzhou.aliyuncs.com/google_containers
version=v1.14.2
images=(`kubeadm config images list --kubernetes-version=$version|awk -F '/' '{print $2}'`)
for imagename in ${images[@]} ; do
  docker pull $url/$imagename
  docker tag $url/$imagename k8s.gcr.io/$imagename
  docker rmi -f $url/$imagename
done
# chmod u+x image.sh
# ./image.sh
# docker images
REPOSITORY                           TAG                 IMAGE ID            CREATED             SIZE
k8s.gcr.io/kube-proxy                v1.14.2             5c24210246bb        10 months ago       82.1MB
k8s.gcr.io/kube-apiserver            v1.14.2             5eeff402b659        10 months ago       210MB
k8s.gcr.io/kube-controller-manager   v1.14.2             8be94bdae139        10 months ago       158MB
k8s.gcr.io/kube-scheduler            v1.14.2             ee18f350636d        10 months ago       81.6MB
k8s.gcr.io/coredns                   1.3.1               eb516548c180        15 months ago       40.3MB
k8s.gcr.io/etcd                      3.3.10              2c4adeb21b4f        16 months ago       258MB
k8s.gcr.io/pause                     3.1                 da86e6ba6ca1        2 years ago         742kB
初始化Master
# kubeadm init --apiserver-advertise-address 192.168.174.156 --pod-network-cidr=10.244.0.0/16
[init] Using Kubernetes version: v1.14.2
[preflight] Running pre-flight checks
[preflight] Pulling images required for setting up a Kubernetes cluster
[preflight] This might take a minute or two, depending on the speed of your internet connection
[preflight] You can also perform this action in beforehand using 'kubeadm config images pull'
[kubelet-start] Writing kubelet environment file with flags to file "/var/lib/kubelet/kubeadm-flags.env"
[kubelet-start] Writing kubelet configuration to file "/var/lib/kubelet/config.yaml"
[kubelet-start] Activating the kubelet service
[certs] Using certificateDir folder "/etc/kubernetes/pki"
[certs] Generating "ca" certificate and key
[certs] Generating "apiserver" certificate and key
[certs] apiserver serving cert is signed for DNS names [master kubernetes kubernetes.default kubernetes.default.svc kubernetes.default.svc.cluster.local] and IPs [10.96.0.1 192.168.174.156]
[certs] Generating "apiserver-kubelet-client" certificate and key
[certs] Generating "front-proxy-ca" certificate and key
[certs] Generating "front-proxy-client" certificate and key
[certs] Generating "etcd/ca" certificate and key
[certs] Generating "etcd/server" certificate and key
[certs] etcd/server serving cert is signed for DNS names [master localhost] and IPs [192.168.174.156 127.0.0.1 ::1]
[certs] Generating "etcd/peer" certificate and key
[certs] etcd/peer serving cert is signed for DNS names [master localhost] and IPs [192.168.174.156 127.0.0.1 ::1]
[certs] Generating "etcd/healthcheck-client" certificate and key
[certs] Generating "apiserver-etcd-client" certificate and key
[certs] Generating "sa" key and public key
[kubeconfig] Using kubeconfig folder "/etc/kubernetes"
[kubeconfig] Writing "admin.conf" kubeconfig file
[kubeconfig] Writing "kubelet.conf" kubeconfig file
[kubeconfig] Writing "controller-manager.conf" kubeconfig file
[kubeconfig] Writing "scheduler.conf" kubeconfig file
[control-plane] Using manifest folder "/etc/kubernetes/manifests"
[control-plane] Creating static Pod manifest for "kube-apiserver"
[control-plane] Creating static Pod manifest for "kube-controller-manager"
[control-plane] Creating static Pod manifest for "kube-scheduler"
[etcd] Creating static Pod manifest for local etcd in "/etc/kubernetes/manifests"
[wait-control-plane] Waiting for the kubelet to boot up the control plane as static Pods from directory "/etc/kubernetes/manifests". This can take up to 4m0s
[apiclient] All control plane components are healthy after 16.003857 seconds
[upload-config] storing the configuration used in ConfigMap "kubeadm-config" in the "kube-system" Namespace
[kubelet] Creating a ConfigMap "kubelet-config-1.14" in namespace kube-system with the configuration for the kubelets in the cluster
[upload-certs] Skipping phase. Please see --experimental-upload-certs
[mark-control-plane] Marking the node master as control-plane by adding the label "node-role.kubernetes.io/master=''"
[mark-control-plane] Marking the node master as control-plane by adding the taints [node-role.kubernetes.io/master:NoSchedule]
[bootstrap-token] Using token: zupr44.5ad2wpkkxl3qesko
[bootstrap-token] Configuring bootstrap tokens, cluster-info ConfigMap, RBAC Roles
[bootstrap-token] configured RBAC rules to allow Node Bootstrap tokens to post CSRs in order for nodes to get long term certificate credentials
[bootstrap-token] configured RBAC rules to allow the csrapprover controller automatically approve CSRs from a Node Bootstrap Token
[bootstrap-token] configured RBAC rules to allow certificate rotation for all node client certificates in the cluster
[bootstrap-token] creating the "cluster-info" ConfigMap in the "kube-public" namespace
[addons] Applied essential addon: CoreDNS
[addons] Applied essential addon: kube-proxy

Your Kubernetes control-plane has initialized successfully!

To start using your cluster, you need to run the following as a regular user:

  mkdir -p $HOME/.kube
  sudo cp -i /etc/kubernetes/admin.conf $HOME/.kube/config
  sudo chown $(id -u):$(id -g) $HOME/.kube/config

You should now deploy a pod network to the cluster.
Run "kubectl apply -f [podnetwork].yaml" with one of the options listed at:
  https://kubernetes.io/docs/concepts/cluster-administration/addons/

Then you can join any number of worker nodes by running the following on each as root:

kubeadm join 192.168.174.156:6443 --token zupr44.5ad2wpkkxl3qesko \
    --discovery-token-ca-cert-hash sha256:d129df5787b082de4f6c5101881b6977e615d65a76cf59d0849a51c339731e12
如果初始化失败,可执行kubeadm reset后重新初始化
# kubeadm reset
# rm -rf $HOME/.kube/config
加载环境变量
# echo "export KUBECONFIG=/etc/kubernetes/admin.conf" >> ~/.bash_profile
# source .bash_profile
安装pod网络
# kubectl apply -f https://raw.githubusercontent.com/coreos/flannel/master/Documentation/kube-flannel.yml
podsecuritypolicy.policy/psp.flannel.unprivileged created
clusterrole.rbac.authorization.k8s.io/flannel created
clusterrolebinding.rbac.authorization.k8s.io/flannel created
serviceaccount/flannel created
configmap/kube-flannel-cfg created
daemonset.apps/kube-flannel-ds-amd64 created
daemonset.apps/kube-flannel-ds-arm64 created
daemonset.apps/kube-flannel-ds-arm created
daemonset.apps/kube-flannel-ds-ppc64le created
daemonset.apps/kube-flannel-ds-s390x created
https://raw.githubusercontent.com/coreos/flannel/master/Documentation/kube-flannel.yml 文件可能需要翻墙
也可点击下面链接下载,下载后解压缩
下载kube-flannel.tar.gz
删除master节点默认污点(可选)
taint:污点的意思。如果一个节点被打上了污点,那么pod是不允许运行在这个节点上面的
默认情况下集群不会在master上调度pod,如果偏想在master上调度Pod,可以执行如下操作:
查看污点:
# kubectl describe node master|grep -i taints
Taints:             node-role.kubernetes.io/master:NoSchedule
删除默认污点:
# kubectl taint nodes master node-role.kubernetes.io/master-
node/master untainted
# kubectl describe node master|grep -i taints
Taints:             <none>
语法:
kubectl taint node [node] key=value[effect]
     其中[effect] 可取值: [ NoSchedule | PreferNoSchedule | NoExecute ]
    NoSchedule: 一定不能被调度
    PreferNoSchedule: 尽量不要调度
    NoExecute: 不仅不会调度, 还会驱逐Node上已有的Pod
打污点
# kubectl taint node master key1=value1:NoSchedule
node/master tainted
# kubectl describe node master|grep -i taints
Taints:             key1=value1:NoSchedule
key为key1,value为value1(value可以为空),effect为NoSchedule表示一定不能被调度
删除污点:
kubectl taint nodes master  key1-
node/master untainted
# kubectl describe node master|grep -i taints
Taints:             <none>
删除指定key所有的effect,‘-’表示移除所有以key1为键的污点
k8s安装(Node节点)
# yum install -y kubelet-1.14.2 kubeadm-1.14.2 kubectl-1.14.2
启动kubelet并设置开机启动
# systemctl enable kubelet && systemctl start kubelet
kubelet命令补全
# echo "source <(kubectl completion bash)" >> ~/.bash_profile
# source .bash_profile
编辑下载镜像的脚本
# cat image.sh
#!/bin/bash
url=registry.cn-hangzhou.aliyuncs.com/google_containers
version=v1.14.2
images=(`kubeadm config images list --kubernetes-version=$version|awk -F '/' '{print $2}'`)
for imagename in ${images[@]} ; do
  docker pull $url/$imagename
  docker tag $url/$imagename k8s.gcr.io/$imagename
  docker rmi -f $url/$imagename
done
# chmod u+x image.sh
# ./image.sh
# docker images
下面这几条命令在master节点上执行
查看令牌
# kubeadm token list
发现之前初始化时的令牌已过期
生成新的令牌
# kubeadm token create
ns2eo4.3tbeaiji7y1jx4hj
生成新的加密串
# openssl x509 -pubkey -in /etc/kubernetes/pki/ca.crt | openssl rsa -pubin -outform der 2>/dev/null |    openssl dgst -sha256 -hex | sed 's/^.* //'
d129df5787b082de4f6c5101881b6977e615d65a76cf59d0849a51c339731e12
node节点加入集群(在node节点上分别执行如下操作)
# kubeadm join 192.168.174.156:6443 --token ns2eo4.3tbeaiji7y1jx4hj --discovery-token-ca-cert-hash sha256:d129df5787b082de4f6c5101881b6977e615d65a76cf59d0849a51c339731e12
[preflight] Running pre-flight checks
[preflight] Reading configuration from the cluster...
[preflight] FYI: You can look at this config file with 'kubectl -n kube-system get cm kubeadm-config -oyaml'
[kubelet-start] Downloading configuration for the kubelet from the "kubelet-config-1.14" ConfigMap in the kube-system namespace
[kubelet-start] Writing kubelet configuration to file "/var/lib/kubelet/config.yaml"
[kubelet-start] Writing kubelet environment file with flags to file "/var/lib/kubelet/kubeadm-flags.env"
[kubelet-start] Activating the kubelet service
[kubelet-start] Waiting for the kubelet to perform the TLS Bootstrap...

This node has joined the cluster:
* Certificate signing request was sent to apiserver and a response was received.
* The Kubelet was informed of the new secure connection details.

Run 'kubectl get nodes' on the control-plane to see this node join the cluster.
集群测试
命令方式部署应用
# kubectl run httpd-app --image=httpd --replicas=3
kubectl run --generator=deployment/apps.v1 is DEPRECATED and will be removed in a future version. Use kubectl run --generator=run-pod/v1 or kubectl create instead.
deployment.apps/httpd-app created
通过命令行方式部署apache服务
配置文件方式部署应用
cat >> nginx.yml << EOF
apiVersion: extensions/v1beta1
kind: Deployment
metadata:
  name: nginx
spec:
  replicas: 3
  template:
    metadata:
      labels:
        app: nginx
    spec:
      restartPolicy: Always
      containers:
      - name: nginx
        image: nginx:latest
EOF
[root@master ~]# kubectl apply -f nginx.yml
deployment.extensions/nginx created
通过配置文件方式部署nginx服务
查看节点状态
# kubectl get nodes
查看pod状态
# kubectl get pod --all-namespaces
NAMESPACE     NAME                             READY   STATUS              RESTARTS   AGE
default       httpd-app-6df58645c6-gfqmf       1/1     Running             0          48s
default       httpd-app-6df58645c6-lsvc5       1/1     Running             0          48s
default       httpd-app-6df58645c6-zqv7m       1/1     Running             0          48s
default       nginx-9d4cf4f77-4rdqj            1/1     Running             0          17s
default       nginx-9d4cf4f77-8rkv8            0/1     ContainerCreating   0          17s
default       nginx-9d4cf4f77-jptbh            1/1     Running             0          17s
kube-system   coredns-fb8b8dccf-76l4s          1/1     Running             0          81m
kube-system   coredns-fb8b8dccf-7tdh6          1/1     Running             0          81m
kube-system   etcd-master                      1/1     Running             0          80m
kube-system   kube-apiserver-master            1/1     Running             0          80m
kube-system   kube-controller-manager-master   1/1     Running             0          80m
kube-system   kube-flannel-ds-amd64-4gzpb      1/1     Running             0          2m26s
kube-system   kube-flannel-ds-amd64-czb96      1/1     Running             0          2m31s
kube-system   kube-flannel-ds-amd64-xm4rc      1/1     Running             0          76m
kube-system   kube-proxy-46gnt                 1/1     Running             0          2m31s
kube-system   kube-proxy-lpgks                 1/1     Running             0          2m26s
kube-system   kube-proxy-vs8ck                 1/1     Running             0          81m
kube-system   kube-scheduler-master            1/1     Running             0          80m
查看副本数
# kubectl get deployments
NAME        READY   UP-TO-DATE   AVAILABLE   AGE
httpd-app   3/3     3            3           72s
nginx       3/3     3            3           41s
# kubectl get pod -o wide
NAME                         READY   STATUS    RESTARTS   AGE   IP           NODE     NOMINATED NODE   READINESS GATES
httpd-app-6df58645c6-gfqmf   1/1     Running   0          78s   10.244.0.4   master   <none>           <none>
httpd-app-6df58645c6-lsvc5   1/1     Running   0          78s   10.244.2.2   node02   <none>           <none>
httpd-app-6df58645c6-zqv7m   1/1     Running   0          78s   10.244.1.2   node01   <none>           <none>
nginx-9d4cf4f77-4rdqj        1/1     Running   0          47s   10.244.1.3   node01   <none>           <none>
nginx-9d4cf4f77-8rkv8        1/1     Running   0          47s   10.244.2.3   node02   <none>           <none>
nginx-9d4cf4f77-jptbh        1/1     Running   0          47s   10.244.0.5   master   <none>           <none>
可以看到nginx和httpd的3个副本pod均匀分布在3个节点上
查看deployment详细信息
# kubectl describe deployments
Name:                   httpd-app
Namespace:              default
CreationTimestamp:      Fri, 10 Apr 2020 17:08:26 +0800
Labels:                 run=httpd-app
Annotations:            deployment.kubernetes.io/revision: 1
Selector:               run=httpd-app
Replicas:               3 desired | 3 updated | 3 total | 3 available | 0 unavailable
StrategyType:           RollingUpdate
MinReadySeconds:        0
RollingUpdateStrategy:  25% max unavailable, 25% max surge
Pod Template:
  Labels:  run=httpd-app
  Containers:
   httpd-app:
    Image:        httpd
    Port:         <none>
    Host Port:    <none>
    Environment:  <none>
    Mounts:       <none>
  Volumes:        <none>
Conditions:
  Type           Status  Reason
  ----           ------  ------
  Available      True    MinimumReplicasAvailable
  Progressing    True    NewReplicaSetAvailable
OldReplicaSets:  <none>
NewReplicaSet:   httpd-app-6df58645c6 (3/3 replicas created)
Events:
  Type    Reason             Age   From                   Message
  ----    ------             ----  ----                   -------
  Normal  ScalingReplicaSet  107s  deployment-controller  Scaled up replica set httpd-app-6df58645c6 to 3


Name:                   nginx
Namespace:              default
CreationTimestamp:      Fri, 10 Apr 2020 17:08:57 +0800
Labels:                 app=nginx
Annotations:            deployment.kubernetes.io/revision: 1
                        kubectl.kubernetes.io/last-applied-configuration:
                          {"apiVersion":"extensions/v1beta1","kind":"Deployment","metadata":{"annotations":{},"name":"nginx","namespace":"default"},"spec":{"replica...
Selector:               app=nginx
Replicas:               3 desired | 3 updated | 3 total | 3 available | 0 unavailable
StrategyType:           RollingUpdate
MinReadySeconds:        0
RollingUpdateStrategy:  1 max unavailable, 1 max surge
Pod Template:
  Labels:  app=nginx
  Containers:
   nginx:
    Image:        nginx:latest
    Port:         <none>
    Host Port:    <none>
    Environment:  <none>
    Mounts:       <none>
  Volumes:        <none>
Conditions:
  Type           Status  Reason
  ----           ------  ------
  Available      True    MinimumReplicasAvailable
OldReplicaSets:  <none>
NewReplicaSet:   nginx-9d4cf4f77 (3/3 replicas created)
Events:
  Type    Reason             Age   From                   Message
  ----    ------             ----  ----                   -------
  Normal  ScalingReplicaSet  76s   deployment-controller  Scaled up replica set nginx-9d4cf4f77 to 3
查看集群基本组件状态
# kubectl get cs
NAME                 STATUS    MESSAGE             ERROR
scheduler            Healthy   ok
controller-manager   Healthy   ok
etcd-0               Healthy   {"health":"true"}
Dashboard安装
准备kubernetes-dashboard.yaml文件
# wget  https://raw.githubusercontent.com/kubernetes/dashboard/master/aio/deploy/recommended/kubernetes-dashboard.yaml
修改镜像地址
# sed -i 's/k8s.gcr.io/registry.cn-hangzhou.aliyuncs.com\/kuberneters/g' kubernetes-dashboard.yaml
由于默认的镜像仓库网络访问不通,故改成阿里镜像
# sed -i '/targetPort:/a\ \ \ \ \ \ nodePort: 30001\n\ \ type: NodePort' kubernetes-dashboard.yaml
配置NodePort,外部通过https://NodeIp:NodePort 访问Dashboard,此时端口为30001
新增管理员帐号
# cat >> kubernetes-dashboard.yaml << EOF
---
# ------------------- dashboard-admin ------------------- #
apiVersion: v1
kind: ServiceAccount
metadata:
  name: dashboard-admin
  namespace: kube-system

---
apiVersion: rbac.authorization.k8s.io/v1beta1
kind: ClusterRoleBinding
metadata:
  name: dashboard-admin
subjects:
- kind: ServiceAccount
  name: dashboard-admin
  namespace: kube-system
roleRef:
  apiGroup: rbac.authorization.k8s.io
  kind: ClusterRole
  name: cluster-admin
 EOF
https://raw.githubusercontent.com/kubernetes/dashboard/master/aio/deploy/recommended/kubernetes-dashboard.yaml可能需要翻墙
也可通过下面的链接下载,下载后解压缩
下载kubernetes-dashboard.tar.gz
若下载上面的链接,不用操作上面对kubernetes-dashboard.yml文件内容替换的操作,链接中的文件已替换好相关内容。
部署Dashboard
# kubectl apply -f kubernetes-dashboard.yaml
secret/kubernetes-dashboard-certs created
secret/kubernetes-dashboard-csrf created
serviceaccount/kubernetes-dashboard created
role.rbac.authorization.k8s.io/kubernetes-dashboard-minimal created
rolebinding.rbac.authorization.k8s.io/kubernetes-dashboard-minimal created
deployment.apps/kubernetes-dashboard created
service/kubernetes-dashboard created
serviceaccount/dashboard-admin created
clusterrolebinding.rbac.authorization.k8s.io/dashboard-admin created
状态查看
[root@master ~]# kubectl get deployment kubernetes-dashboard -n kube-system
NAME                   READY   UP-TO-DATE   AVAILABLE   AGE
kubernetes-dashboard   1/1     1            1           18m
[root@master ~]#  kubectl get pods -n kube-system -o wide
NAME                                    READY   STATUS    RESTARTS   AGE    IP                NODE     NOMINATED NODE   READINESS GATES
coredns-fb8b8dccf-76l4s                 1/1     Running   0          117m   10.244.0.3        master   <none>           <none>
coredns-fb8b8dccf-7tdh6                 1/1     Running   0          117m   10.244.0.2        master   <none>           <none>
etcd-master                             1/1     Running   0          116m   192.168.174.156   master   <none>           <none>
kube-apiserver-master                   1/1     Running   0          116m   192.168.174.156   master   <none>           <none>
kube-controller-manager-master          1/1     Running   0          116m   192.168.174.156   master   <none>           <none>
kube-flannel-ds-amd64-4gzpb             1/1     Running   0          38m    192.168.174.158   node02   <none>           <none>
kube-flannel-ds-amd64-czb96             1/1     Running   0          39m    192.168.174.157   node01   <none>           <none>
kube-flannel-ds-amd64-xm4rc             1/1     Running   0          113m   192.168.174.156   master   <none>           <none>
kube-proxy-46gnt                        1/1     Running   0          39m    192.168.174.157   node01   <none>           <none>
kube-proxy-lpgks                        1/1     Running   0          38m    192.168.174.158   node02   <none>           <none>
kube-proxy-vs8ck                        1/1     Running   0          117m   192.168.174.156   master   <none>           <none>
kube-scheduler-master                   1/1     Running   0          116m   192.168.174.156   master   <none>           <none>
kubernetes-dashboard-7b87f5bdd6-z7smh   1/1     Running   0          18m    10.244.1.4        node01   <none>           <none>
[root@master ~]# kubectl get services -n kube-system
NAME                   TYPE        CLUSTER-IP      EXTERNAL-IP   PORT(S)                  AGE
kube-dns               ClusterIP   10.96.0.10      <none>        53/UDP,53/TCP,9153/TCP   118m
kubernetes-dashboard   NodePort    10.111.109.30   <none>        443:30001/TCP            18m
令牌查看
# kubectl describe secrets -n kube-system dashboard-admin
Name:         dashboard-admin-token-j4xtf
Namespace:    kube-system
Labels:       <none>
Annotations:  kubernetes.io/service-account.name: dashboard-admin
              kubernetes.io/service-account.uid: 6fd1aa35-7b0d-11ea-ae41-000c29b70c6b

Type:  kubernetes.io/service-account-token

Data
====
ca.crt:     1025 bytes
namespace:  11 bytes
token:      eyJhbGciOiJSUzI1NiIsImtpZCI6IiJ9.eyJpc3MiOiJrdWJlcm5ldGVzL3NlcnZpY2VhY2NvdW50Iiwia3ViZXJuZXRlcy5pby9zZXJ2aWNlYWNjb3VudC9uYW1lc3BhY2UiOiJrdWJlLXN5c3RlbSIsImt1YmVybmV0ZXMuaW8vc2VydmljZWFjY291bnQvc2VjcmV0Lm5hbWUiOiJkYXNoYm9hcmQtYWRtaW4tdG9rZW4tajR4dGYiLCJrdWJlcm5ldGVzLmlvL3NlcnZpY2VhY2NvdW50L3NlcnZpY2UtYWNjb3VudC5uYW1lIjoiZGFzaGJvYXJkLWFkbWluIiwia3ViZXJuZXRlcy5pby9zZXJ2aWNlYWNjb3VudC9zZXJ2aWNlLWFjY291bnQudWlkIjoiNmZkMWFhMzUtN2IwZC0xMWVhLWFlNDEtMDAwYzI5YjcwYzZiIiwic3ViIjoic3lzdGVtOnNlcnZpY2VhY2NvdW50Omt1YmUtc3lzdGVtOmRhc2hib2FyZC1hZG1pbiJ9.dP34FDNIndektaXZHpE_vAlXTK7LQLHt255mOsD6jQS87CKhZMrNDmfq_RJmeh4y3fnunWVqP2U_3AxA-Ky384dnpJ5TLEfANRaW_N1loDUbyFiqvh-TU2N5gYt-g0NKd-HNeNID9yakKuXmLNHMQQedB-hY5UaVomtS4rTLTtCvE4Iz8kqbGQCzu3ILUE8P1tZQdfMqT8GblnV6E-ni76zXtqhBITK71Bqge-oNUAaNTZ-nPVYG3WLxkdmwWGR09AtWS9CAuNRkfIwIb93WMvrXW4dQfgTWnd7IsN4vwM8gFTGn2Kb3Y4IIVn1DRc94sA9pb1qDNHAitPo1IQeViQ
令牌为:eyJhbGciOiJSUzI1NiIsImtpZCI6IiJ9.eyJpc3MiOiJrdWJlcm5ldGVzL3NlcnZpY2VhY2NvdW50Iiwia3ViZXJuZXRlcy5pby9zZXJ2aWNlYWNjb3VudC9uYW1lc3BhY2UiOiJrdWJlLXN5c3RlbSIsImt1YmVybmV0ZXMuaW8vc2VydmljZWFjY291bnQvc2VjcmV0Lm5hbWUiOiJkYXNoYm9hcmQtYWRtaW4tdG9rZW4tajR4dGYiLCJrdWJlcm5ldGVzLmlvL3NlcnZpY2VhY2NvdW50L3NlcnZpY2UtYWNjb3VudC5uYW1lIjoiZGFzaGJvYXJkLWFkbWluIiwia3ViZXJuZXRlcy5pby9zZXJ2aWNlYWNjb3VudC9zZXJ2aWNlLWFjY291bnQudWlkIjoiNmZkMWFhMzUtN2IwZC0xMWVhLWFlNDEtMDAwYzI5YjcwYzZiIiwic3ViIjoic3lzdGVtOnNlcnZpY2VhY2NvdW50Omt1YmUtc3lzdGVtOmRhc2hib2FyZC1hZG1pbiJ9.dP34FDNIndektaXZHpE_vAlXTK7LQLHt255mOsD6jQS87CKhZMrNDmfq_RJmeh4y3fnunWVqP2U_3AxA-Ky384dnpJ5TLEfANRaW_N1loDUbyFiqvh-TU2N5gYt-g0NKd-HNeNID9yakKuXmLNHMQQedB-hY5UaVomtS4rTLTtCvE4Iz8kqbGQCzu3ILUE8P1tZQdfMqT8GblnV6E-ni76zXtqhBITK71Bqge-oNUAaNTZ-nPVYG3WLxkdmwWGR09AtWS9CAuNRkfIwIb93WMvrXW4dQfgTWnd7IsN4vwM8gFTGn2Kb3Y4IIVn1DRc94sA9pb1qDNHAitPo1IQeViQ
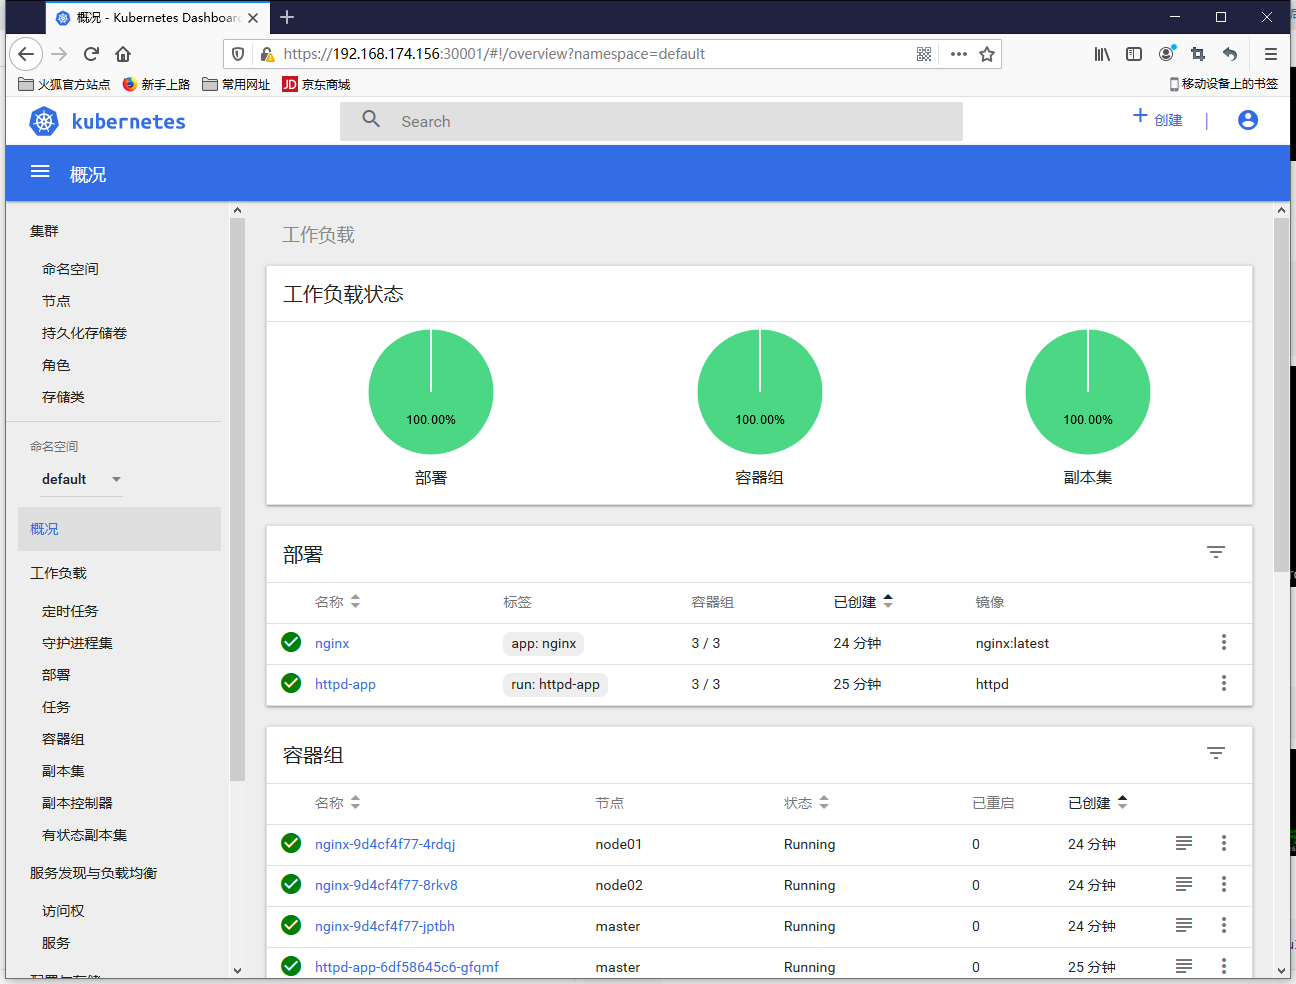
web访问
https://192.168.174.156:30001
ie,chrome访问打不开,使用火狐浏览器通过令牌方式登录访问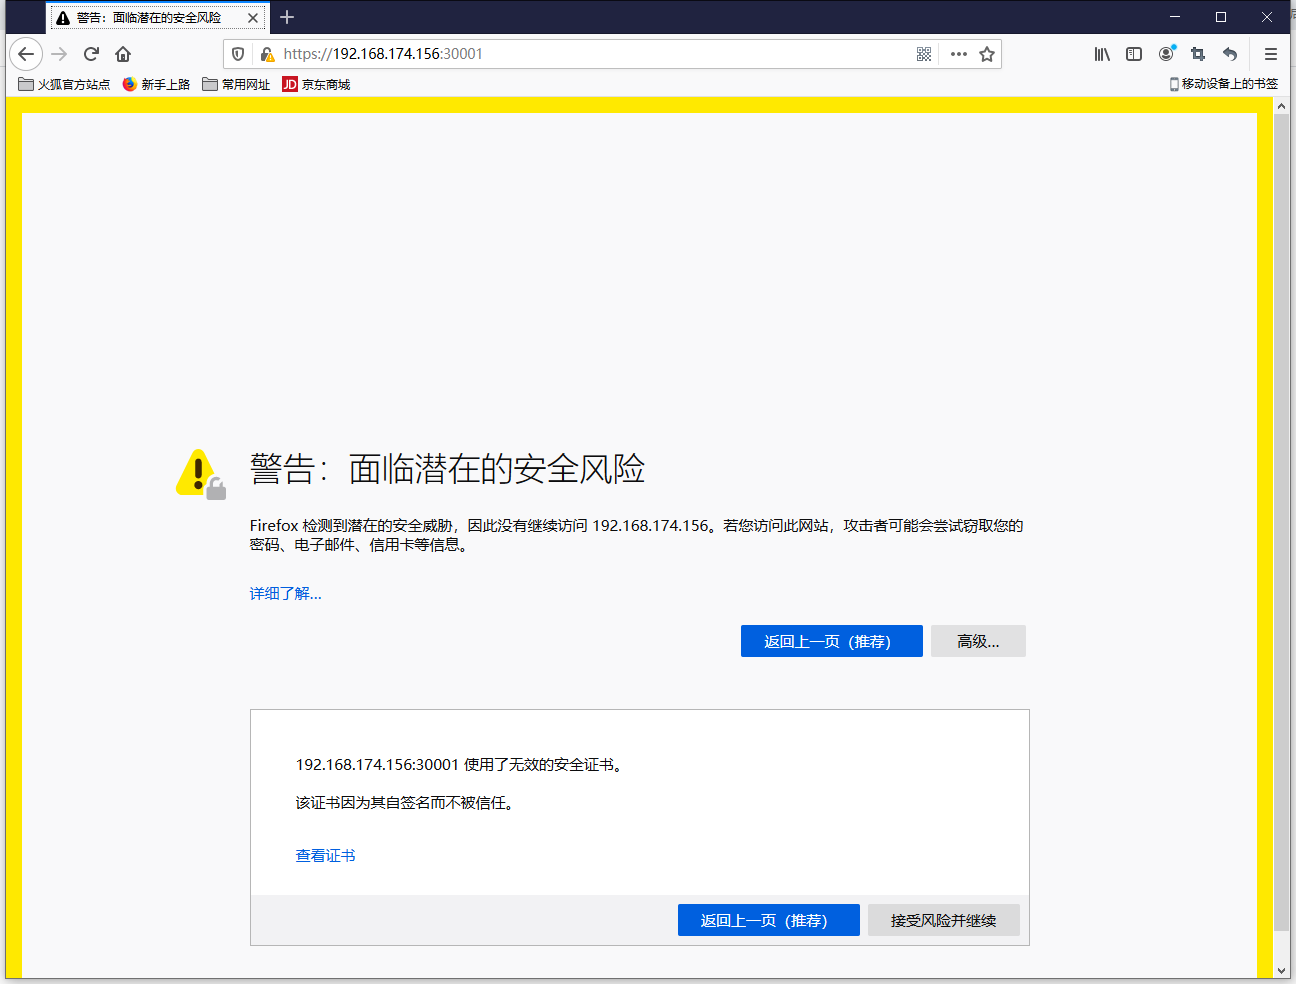

几个常见的错误
cpu数量<2; swap未关
[root@master ~]# kubeadm init
W0420 14:07:37.619246    2071 version.go:102] could not fetch a Kubernetes version from the internet: unable to get URL "https://dl.k8s.io/release/stable-1.txt": Get https://dl.k8s.io/release/stable-1.txt: net/http: request canceled while waiting for connection (Client.Timeout exceeded while awaiting headers)
W0420 14:07:37.619467    2071 version.go:103] falling back to the local client version: v1.18.2
W0420 14:07:37.619558    2071 configset.go:202] WARNING: kubeadm cannot validate component configs for API groups [kubelet.config.k8s.io kubeproxy.config.k8s.io]
[init] Using Kubernetes version: v1.18.2
[preflight] Running pre-flight checks
        [WARNING Firewalld]: firewalld is active, please ensure ports [6443 10250] are open or your cluster may not function correctly
        [WARNING Service-Docker]: docker service is not enabled, please run 'systemctl enable docker.service'
        [WARNING IsDockerSystemdCheck]: detected "cgroupfs" as the Docker cgroup driver. The recommended driver is "systemd". Please follow the guide at https://kubernetes.io/docs/setup/cri/
error execution phase preflight: [preflight] Some fatal errors occurred:
        [ERROR NumCPU]: the number of available CPUs 1 is less than the required 2
        [ERROR Swap]: running with swap on is not supported. Please disable swap
[preflight] If you know what you are doing, you can make a check non-fatal with `--ignore-preflight-errors=...`
To see the stack trace of this error execute with --v=5 or higher
cpu数量需要>=2,关闭swap
# systemctl stop firewalld
# systemctl disable firewalld
# setenforce 0
# sed -i 's/SELINUX=.*/SELINUX=disabled/g' /etc/selinux/config
# swapoff -a
# sed -i.bak '/swap/s/^/#/' /etc/fstab
内核参数未修改
# kubeadm init
W0420 14:57:44.307120    2226 configset.go:202] WARNING: kubeadm cannot validate component configs for API groups [kubelet.config.k8s.io kubeproxy.config.k8s.io]
[init] Using Kubernetes version: v1.18.2
[preflight] Running pre-flight checks
        [WARNING Service-Docker]: docker service is not enabled, please run 'systemctl enable docker.service'
        [WARNING IsDockerSystemdCheck]: detected "cgroupfs" as the Docker cgroup driver. The recommended driver is "systemd". Please follow the guide at https://kubernetes.io/docs/setup/cri/
error execution phase preflight: [preflight] Some fatal errors occurred:
        [ERROR FileContent--proc-sys-net-bridge-bridge-nf-call-iptables]: /proc/sys/net/bridge/bridge-nf-call-iptables contents are not set to 1
[preflight] If you know what you are doing, you can make a check non-fatal with `--ignore-preflight-errors=...`
To see the stack trace of this error execute with --v=5 or higher
内核参数修改
# cat <<EOF >  /etc/sysctl.d/k8s.conf
net.bridge.bridge-nf-call-ip6tables = 1
net.bridge.bridge-nf-call-iptables = 1
EOF
# sysctl -p /etc/sysctl.d/k8s.conf
转载请注明来源,欢迎指出任何有错误或不够清晰的表达。可以邮件至 backendcloud@gmail.com

